
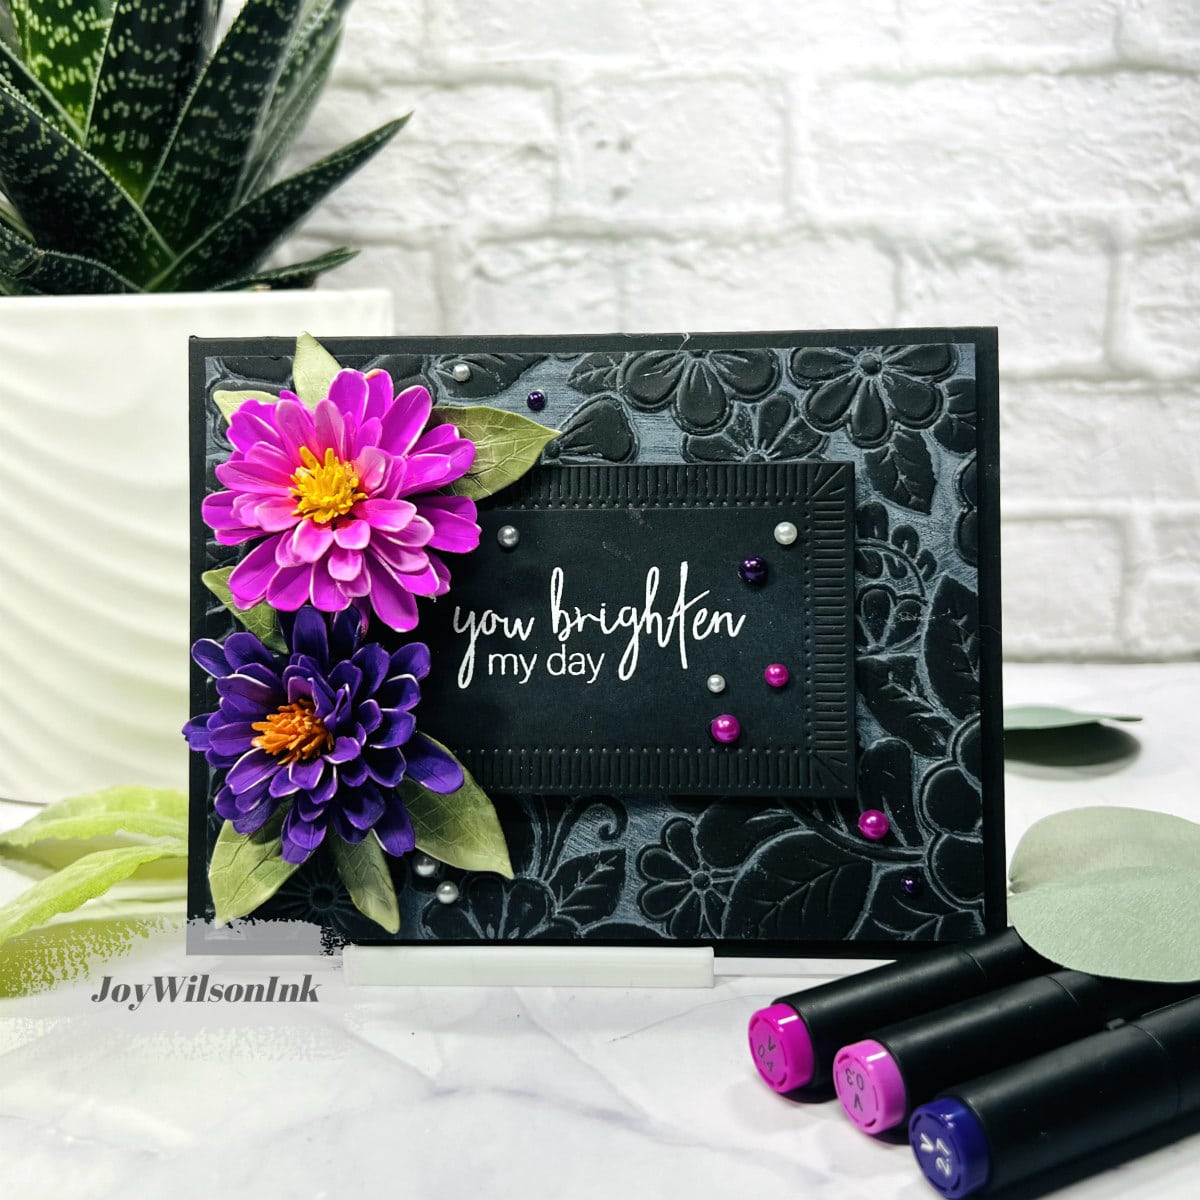
Hello friends. I have had a few people ask me how I Ink embossed panels, so I thought I show you and make a 3D Bud Zinnia from the new PaInter’s Garden Collection at Spellbinders. The Zinnia die can be either used as directed, or a few layers added to it to create a bud zinnia. I hope you like this one. These are the kind of Zinnias I have in my yard each summer.

I find that doing all of my die cutting at once and separating the pieces out makes for coloring and assembling the pieces the easiest. Spellbinders dies have the number of petals needed etched on each die, but I added an extra set for each. I colored these beautiful Zinnia dies with Olo markers to get the vibrant purples. Next I applied Distress Oxide Ink in the color Lost Shadow to the inside of the February 3D Embossing Folder called Spring Burst and ran it through my die machine. Finally I embossed a greeting onto a Flute Essential Rectangle before building the floral arrangement.
Team Spellbinders Instagram
Spellbinders Youtube
Just a small disclaimer! All items used in all of my projects are (or have been) purchased with my own funds, but this does not include design team items that I have received or otherwise stated.

You can connect with me here:
IG @joywilsonink
Pinterest
Youtube
Until next time keep crafting!!!